How To Propagate Polka Dot Plant (Hypoestes phyllostachya)

Named after its beautiful dotty leaves that look like Polka dots, the Polka dot plant is an impressive house plant that comes in a variety of colors. The Hypoestes phyllostachya can be pink, white, white, or even red.
I keep my polkadot plant on a bookshelf that doesn't get a lot of direct sunlight. I water it when the top of the soil is dry, and I've been misting it up to 2 to 3 times a day.
The polka dot plant is a one-of-a-kind plant that is known to be quite simple to maintain. In this post, we'll go through the different ways you can grow the Polka Dot plant and how to do it correctly.
You may propagate a Polka Dot plant from scratch or expand your home garden by adding another pot to your existing collection if you follow these steps. With that in mind, let's get started with some of the reasons why you may need to grow a polka dot plant.
Reasons for propagating Polka Dot Plant?
Multiply your plant collection
Propagating is one of the ways you can create more polka dot plants for your garden without spending money on buying a new pot. Whether you're looking to expand your collection or grow more plants you can gift to your friends, learning to propagate will definitely serve its purpose.
Save a dying Plant
Polka Dot plants are simple to grow. However, if you inadvertently overfertilize, overwater, or mistreat your plant in any way, it may begin to die. By propagation, you can establish a new robust plant before it's too late.
What are the methods for propagating Polka Dot Plant?
To propagate your Polka Dot plant, you can either do so using the stem cuttings of the plant or divide the entire mother plant to start a new one while keeping the old one instead as well.
Propagating with stem cutting
This method of propagation works regardless of the age or maturity of your plant. By taking just a few cuttings from your existing plant, you can grow a new plant. The method is particularly great if your plant tends to grow leggy and you need to prune it often. This means you’ll end up with clippings that you might have to throw away unless you reroot them.
How do you take a cutting from a polka dot plant?
This is relatively easy to do. You simply need to identify a node on the plant, these are small bumps on the stem from which the leaves are meant to grow. Once the node is identified, you cut just below the node, remove any leaves that are likely to fall below the water or soil, and use the stem cutting to grow your new polka dot plant.
Propagating by dividing the entire mother plant
You can go this route if you have a large and mature plant already and you’ll like a new plant for any other reason. This method is great because it allows you to grow a new plant instantly instead of waiting for a long time for stem cuttings to start growing leaves and new roots.
Methods and step by step process for propagating polka dot plant
Whether you’re using stem cuttings or an entire plant, Polka Dot can either be propagated in water or directly in potting soil. Either method is simple and it takes very little effort to get started.
Water Propagation Method
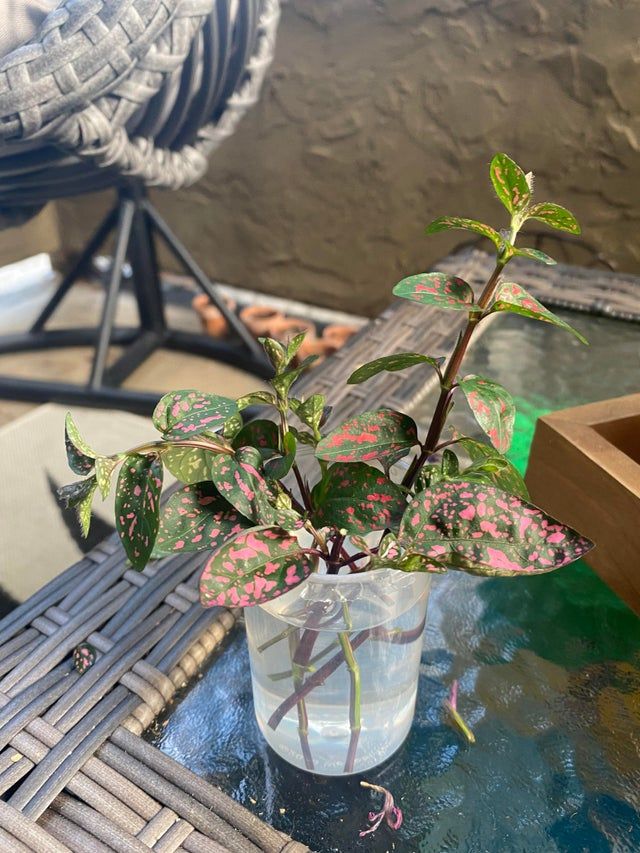
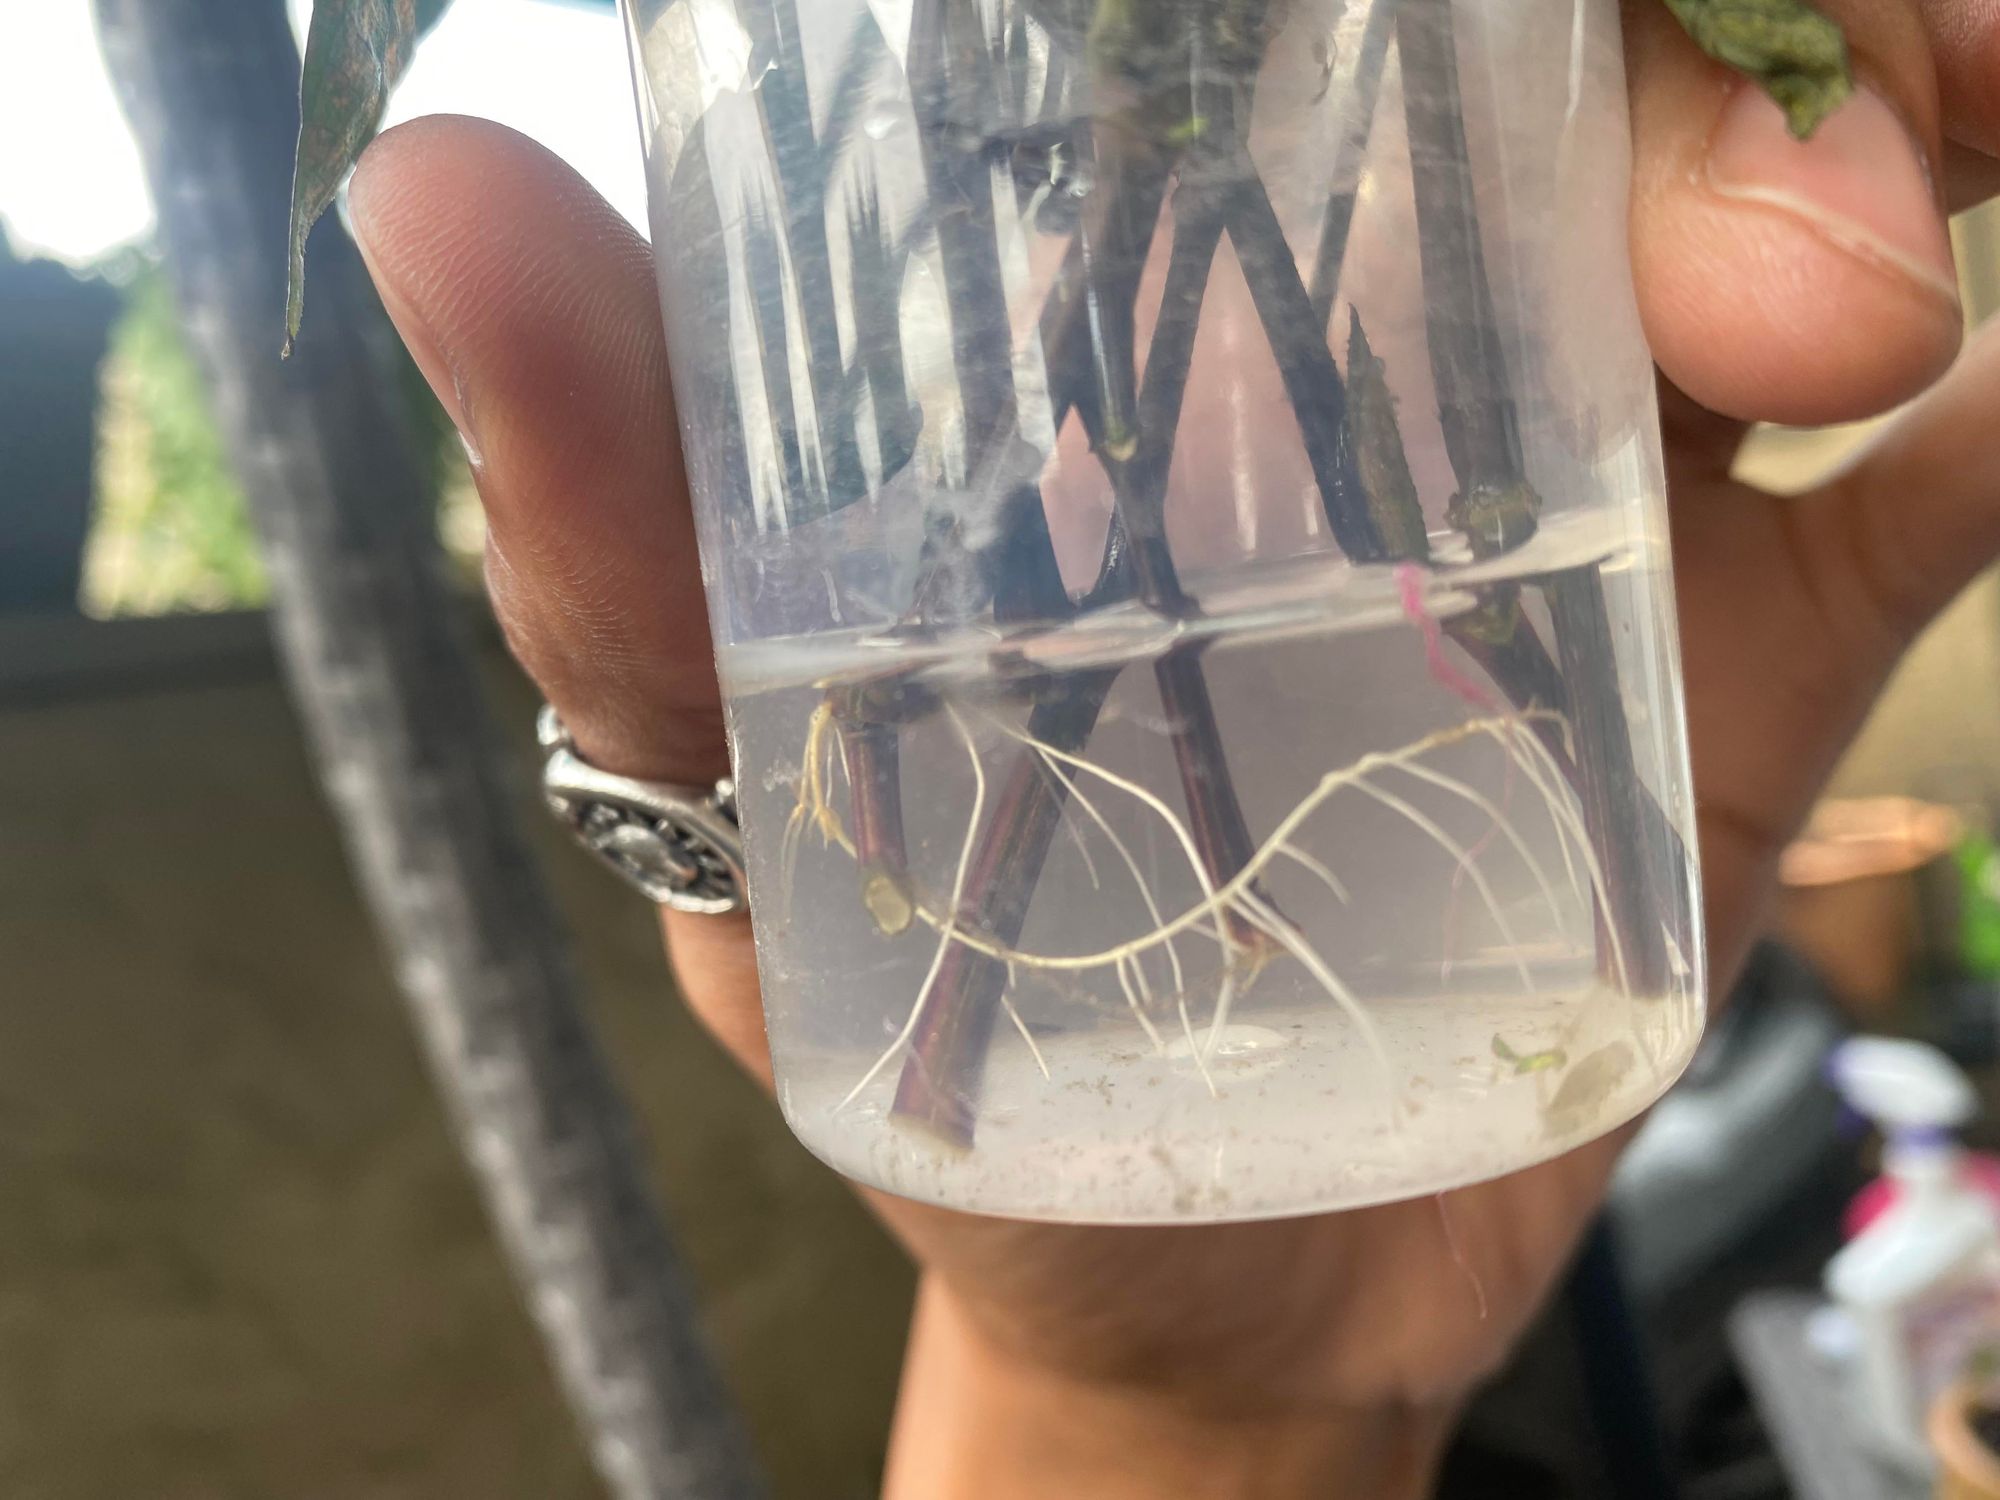
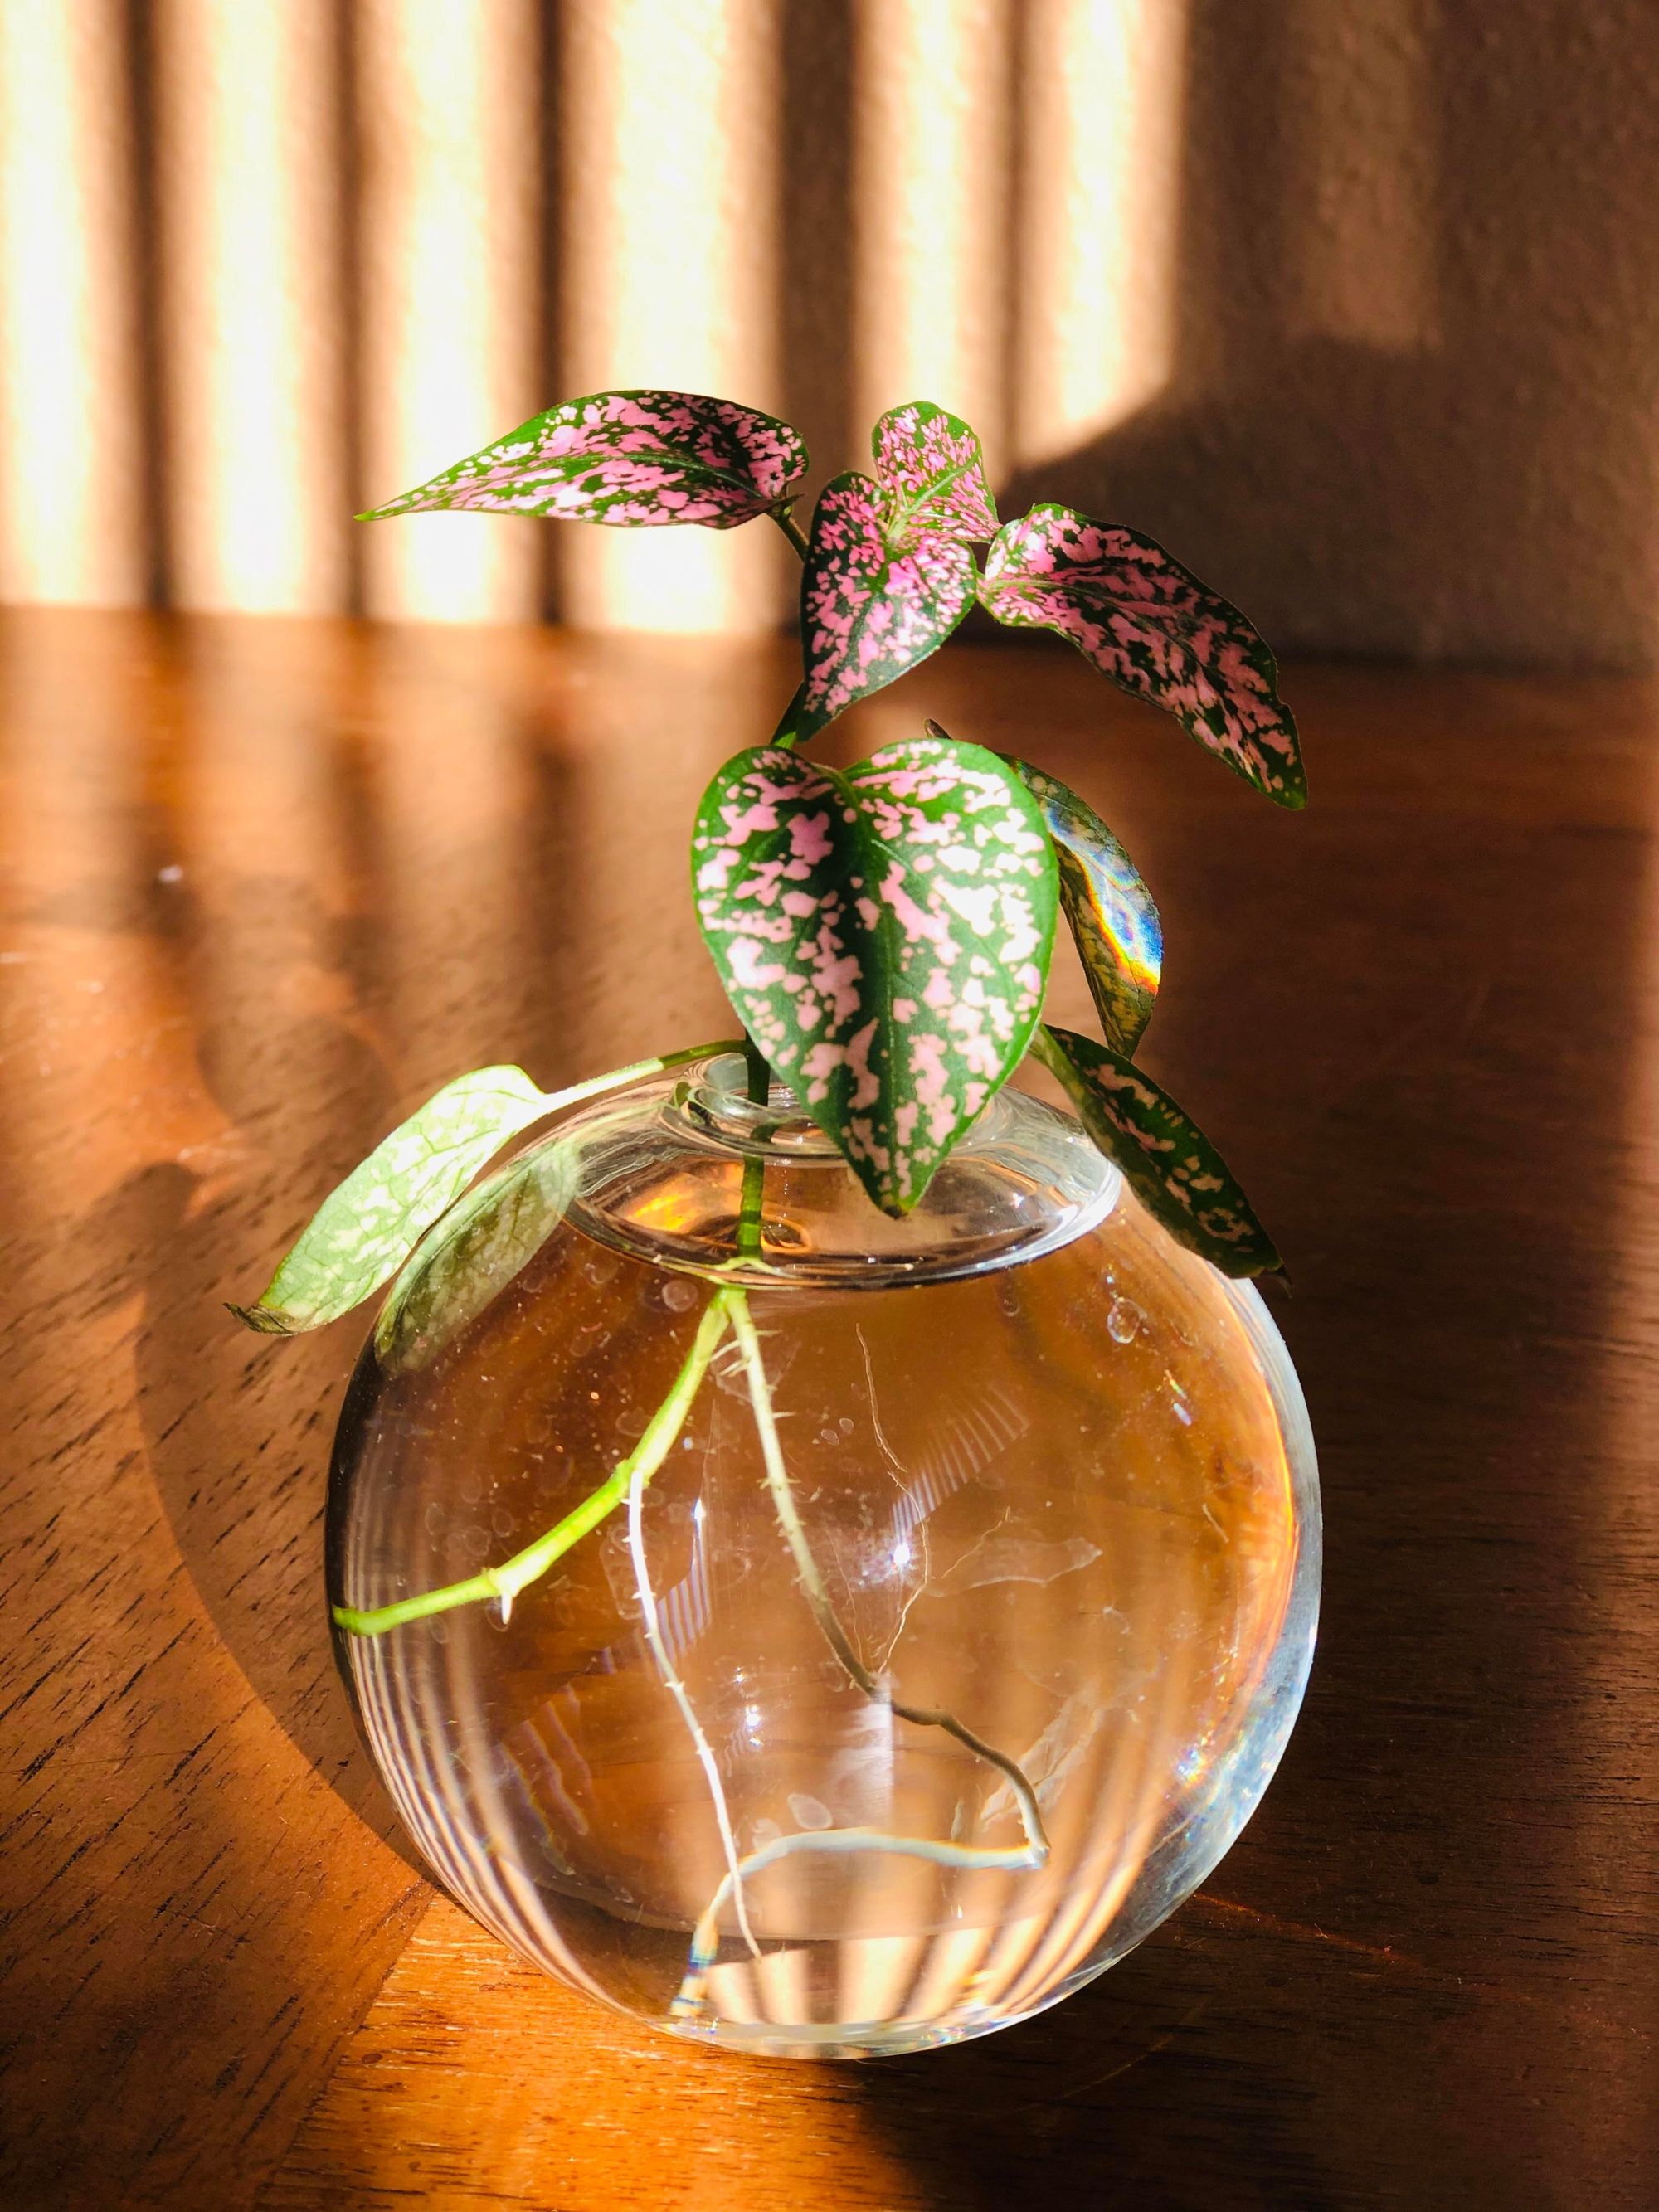
This is the simplest approach to propagating your Polka Dot Plant. Propagation in water takes as little effort as possible. This method works for several houseplants including Polka Dot plants and has many benefits. Since you will be propagating the plant in a clear container filled with water, you get to see the roots grow on the cuttings in real-time. This growth phase is also quite attractive to observe. Here’s a step-by-step guide to propagating your Polka Dot in water.
Step one: Finding nodes
Choose a section of your plant with a couple of nodes and at least two healthy leaves. This is the section of your plant that you’ll be cutting. You can select as many as possible because the number of cuttings determines how successful you’re likely to be with the propagation.
Step Two: Cutting the nodes
You can use a sharp knife or pair of scissors for this. Cut small clippings of about 2-inches each in length to be used as cuttings for propagating your new plant.
Step three: Place cuttings in a container of water.
You can use pretty much any container for this purpose. Just make sure you’re able to submerge at least one of the nodes on the cutting you’re using. The container should be placed near a window with access to indirect sunlight since direct sun might be a little too much for it.
The water needs to be changed at least once a week to remove gunk buildup. Usually, it takes about a week for new roots to start growing on the stem cuttings. After the roots are at least two inches in length, you can repot the plant.
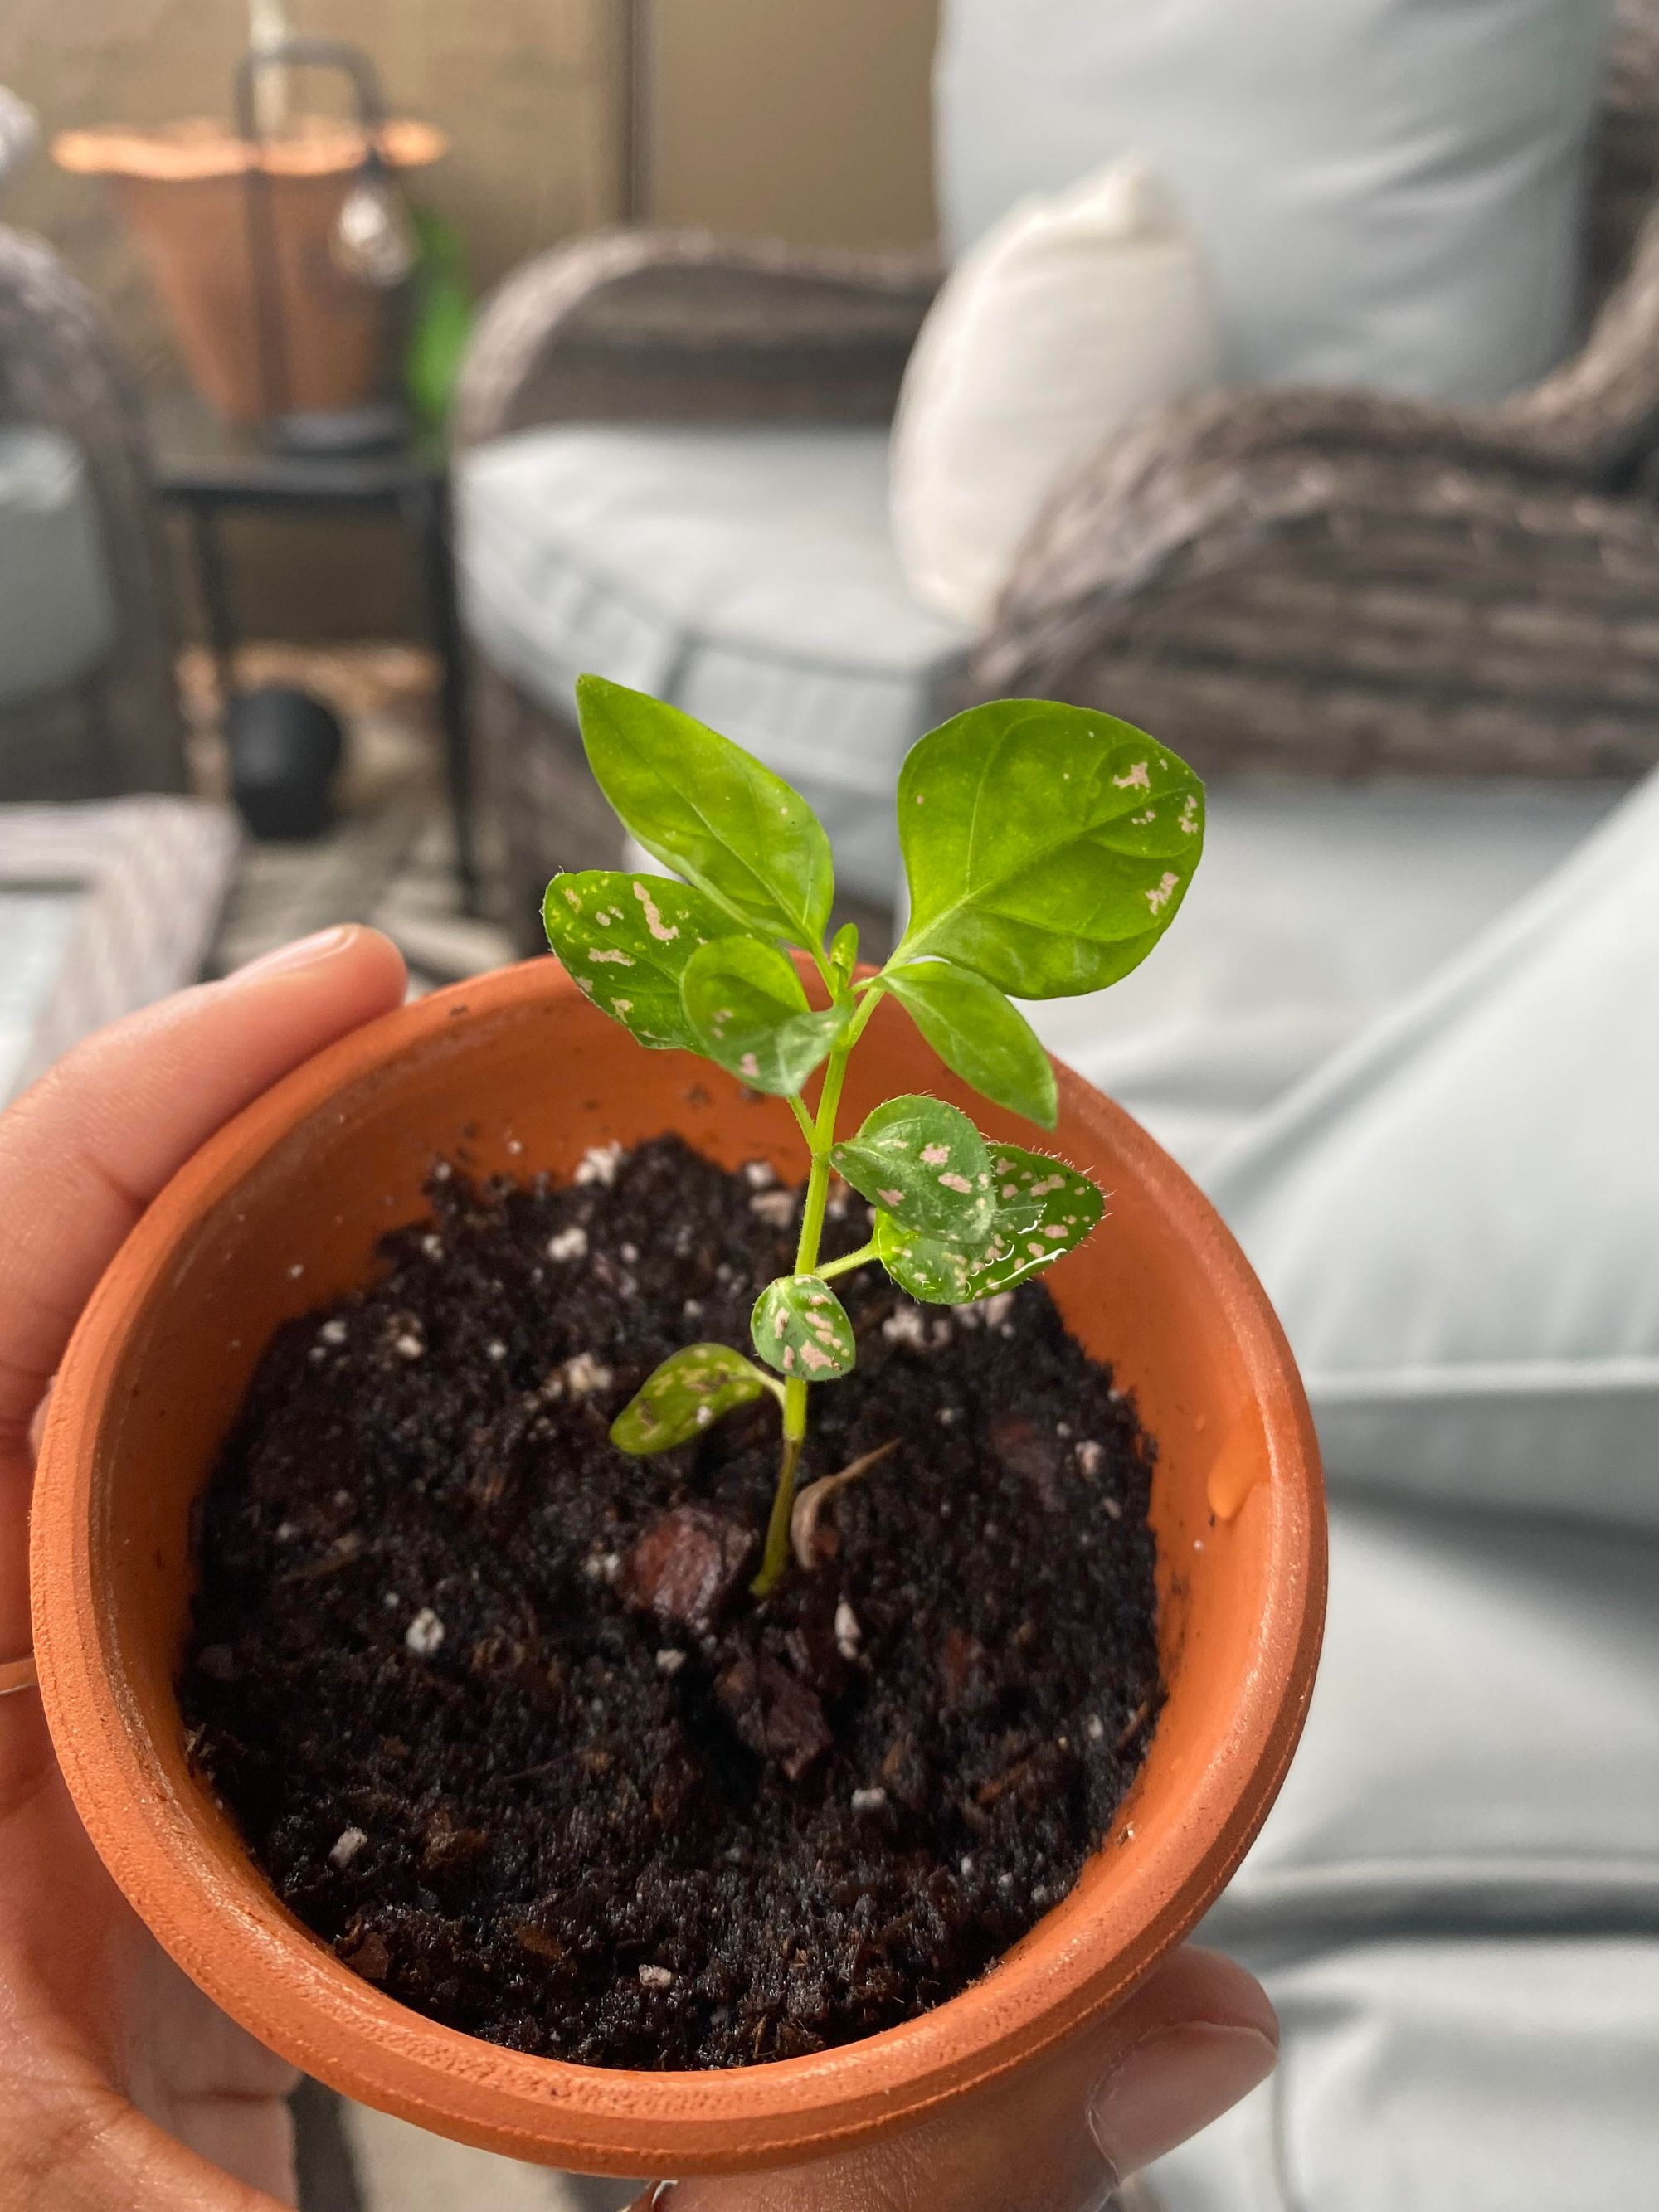
Soil Propagation Method
There aren’t a lot of differences between the soil method of propagation and the water method highlighted above. You’ll need to get stem cuttings as well, then prepare your potting soil for planting them. Polka Dot stem cuttings will grow well in any standard plastic nursery planter.
A lot of people use cactus mix for this. However, any simple soil mix with coarse soil will work just great too. Even a general houseplant soil will work as well. Just mix with a little perlite to make it airier and increase the drainage of the soil. This is necessary because you don’t want your cutting sitting in waterlogged soil as this can lead to root rot.
When you’re ready, poke the stem cuttings into the soil as gently as possible. Water occasionally to keep the soil moist. But make sure you don’t overdo it so it doesn’t get soggy. Unlike the water method, you won’t be able to see the roots of your new Polka Dot plant growing. This makes it difficult to tell when the propagation is successful and your new plant now has roots. Just wait a few weeks and try giving the cutting a slight tug.
Polka Dot plants grow roots a lot faster than many other house plants. If the propagation is done properly and is successful, you should start to see new roots and leaves grow on your plant within a few days or weeks. Of course, the success of your propagation efforts and how long it’ll take depends on different factors. Sometimes, a little patience might be necessary. Just make sure you’re caring for the cutting properly while you wait.
When is the right time to propagate your Polka Dot plant?
The best time for propagating any house plant including Polka Dot Plants is during the spring season (after the last of the winter weather is gone). This ensures that your plant gets sufficient sunlight and health to grow properly.
However, one of the most impressive things about Polka Dot Plants is how quickly they grow. You can get away with a new propagation during any season of the year. However, if you’re growing the plant under unfavorable conditions such as low light or cold temperature, you may need to adjust the condition using heat pads and heat pads to maintain the ideal condition.
Don't forget to Prune your Polkadot plant!
Pruning every few weeks (2-3weeks) is critical for this plant. This is due to the fact that, after a while, the polkadot plant becomes leggy and tall. You should trim it back so that it may develop fuller and bushier once it has become leggy. When you cut just above the node, the leaves will grow faster and thicker.
Conclusion
As you can see, Polka Dot plants are relatively easy to propagate. You can start with clippings or stem cuttings or separate the entire plant into new pots. Either method works whether you’re growing in water or planting them in well-drained soil.